Grown-Up Goals. Kid-Sized Joy.
Learning in disguise.
Starting a preschool requires a thoughtful balance of functional classroom furniture, open-ended educational materials, and the appropriate safety supplies.
Depending upon your budget, you can choose to buy the higher priced, presumably longer lasting equipment, or go for new items at a lesser price, or if you have a limited budget you can shop for used items of good quality. Sometimes, there are grants available to help with the purchases.
Here is a comprehensive list categorized by the different "zones" and operational needs of a high-quality preschool environment. I have provided links to Amazon and other places to help you locate items that would be a good fit for the classroom, daycare or home use.
1. Large Furniture & Classroom Infrastructure
This category focuses on the "bones" of the room. Items should be durable, easy to clean, and sized specifically for children (ages 2–6).
Tables and Seating: * Kid-sized rectangular or kidney-shaped tables for group work.
Stackable, ergonomic plastic or wooden chairs
Storage Units: Low, open shelving units (allows children to reach toys independently).
Individual cubbies or lockers for coats, bags, and personal items.
Clear bins/totes and wicker baskets for organizing manipulatives.
Circle Time Area: * A large, soft area rug (often with letters, numbers, or shapes).
A teacher’s chair or stool.
A whiteboard, easel or flannel board for daily lessons.
2. Creative Arts & Messy Play
Art promotes fine motor skills and self-expression. It is essential to stock both consumable and non-consumable items.
Tools: Child-safe scissors, various sizes of paint brushes , sponges, and smocks.
Consumables: Often you can request that parents provide these items when the child starts at your center. It is common to charge a supply fee to pay for these supplies too.
Sometimes you can get great deals on these items at Back to School sales, or even after school starts clearance sales.
Construction paper, cardstock, and large rolls of butcher paper.
Washable tempera paint, watercolors, and finger paints. ( PRO TIP: Add a drop of Dawn detergent into your paints and it will wash out of clothes better.)
Glue sticks, liquid school glue, and masking tape.
Crayons, washable markers, and colored pencils.
Tactile Materials: Playdough (and tools like rollers/cutters), shaving cream for sensory writing, and collage materials (feathers, googly eyes, buttons).
3. Learning Centers & Toys
Educational experts recommend "centers" where children can focus on specific types of play.
Dramatic Play (The "House" Center):
Play kitchen set with play food and dishes.
Dress-up clothes, mirrors, and "professional" props (stethoscopes, cash registers).
Dolls and doll furniture.
Block & Building Center:
Wooden unit blocks and magnetic building tiles.
Vehicle sets (cars, trucks, airplanes).
Small animal figurines and "people" figures for storytelling.
Puzzles (choose a variety of puzzles that can be used as the children's skills improve.)
Literacy & Library:
A diverse collection of board books and picture books.
Comfortable seating (bean bags or floor cushions).
Letter magnets and alphabet puzzles. (Kids love to play with magnets on a magnetic board or the side of a file cabinet.)
STEM & Manipulatives:
Counting bears, linking cubes, and pattern blocks.
Magnifying glasses, magnets, and simple scales.
Sensory bin table (for rice, sand, or water play).
4. Health, Safety & Hygiene
Meeting licensing requirements usually starts with this non-negotiable list.
Safety Essentials:
Mounted fire extinguishers (must be commercial grade fire extinguishers) and smoke/carbon monoxide detectors.
Comprehensive first-aid kits (one for inside, one for travel/outside).
Outlet covers and furniture anchors.
Sanitation:
Hands-free trash cans.
Commercial-grade disinfectant spray and paper towels.
Disposable Gloves for diapering or wound care.
Napping Supplies:
Stackable cots or padded nap mats.
Individual sheets and blankets (stored separately to prevent cross-contamination).
5. Outdoor & Gross Motor Gear
Preschoolers need to burn energy and develop large muscle groups daily.
Active Play: Tricycles, ride on toys, helmets, and push-toys.
Physical Education: Hula hoops, bean bags, various sizes of soft balls, and a parachute.
Nature Play: Gardening tools (small shovels and watering cans) and a sturdy sandbox.
6. Administrative & Teacher Supplies
Even a home-based setup needs a professional "back office" to track progress.
Organization: A heavy-duty laminator, printer/scanner, and filing cabinets for student records.
Documentation: Binders for lesson plans, attendance logs, and portfolios for student work.
Are you planning to focus on a specific educational philosophy, such as Montessori or play-based learning, for this setup?
To keep a Montessori preschool running smoothly, the daily schedule revolves around the "Work Cycle"—a long, uninterrupted block of time (usually 2.5 to 3 hours) where children choose their own activities and work at their own pace.
Below is a sample daily schedule and a breakdown of how to structure the three-hour work block effectively.
Sample Montessori Daily Schedule
4:00 AM – 8:30 AM
Early Arrival & Soft Start
For those arriving early, low-energy activities like reading, soft music, or simple practical life tasks (watering plants).
8:30 AM – 9:00 AM
Morning Circle
A brief gathering to greet one another, discuss the calendar/weather, and introduce a new "work" or lesson.
9:00 AM – 12:00 PM
The Main Work Cycle
The core of the day. Children select tasks from the shelves (Practical Life, Sensorial, Math, etc.).
12:00 PM – 1:00 PM
Lunch & Clean Up
Children help set the table, serve food, and wash their own dishes—a key Practical Life skill.
1:00 PM – 3:00 PM
Outdoor Exploration / Nap
Older children may continue advanced work or go outside; younger children typically nap during this window.
Afternoon Work / Specials
A shorter work period or "specials" like music, art, or a second language.
4:30 PM – 6:00 PM
Dismissal & Quiet Play
Gathering belongings, light snack, and free-choice activities until pickup.
Choose a style for your preschool:
Montessori
Structuring the 3-Hour Work Cycle
The magic of Montessori happens in this uninterrupted block. Here is how you, as the guide, manage the room:
1. The Individual Lesson
While the group is working independently, you move quietly through the room. You might invite one or two children to a rug for a Three-Period Lesson:
Naming: "This is the unit bead."
Recognition: "Can you show me the unit bead?"
Recall: "What is this called?"
2. Freedom Within Limits
Children are free to choose any work they have already been "shown" how to use. They must finish the cycle of work:
Take the tray/mat to the workspace.
Complete the task with focus.
Return the materials exactly as they found them for the next person.
3. Grace and Courtesy
This is a specific "curriculum" that happens during the work cycle. You might pull a small group aside to practice:
How to walk around someone’s work rug without stepping on it.
How to cough into an elbow.
How to interrupt a teacher politely by placing a hand on their shoulder.
Organizing the Shelves for Success
To facilitate this schedule, the environment must be "self-teaching."
Left-to-Right Progression: Arrange shelves so that simpler tasks are on the left and more complex tasks are on the right. This subconsciously prepares the child’s brain for reading and writing.
Isolation of Difficulty: Each tray should focus on one skill. For example, if the goal is "pouring," don't also make the pitcher heavy or the water colored. Start with just pouring dry beans, then move to water once the motion is mastered.
Control of Error: Most Montessori materials are designed so the child knows if they made a mistake without you telling them. If there is one peg left over in a counting game, they know they missed a step and can self-correct.
Starting a preschool
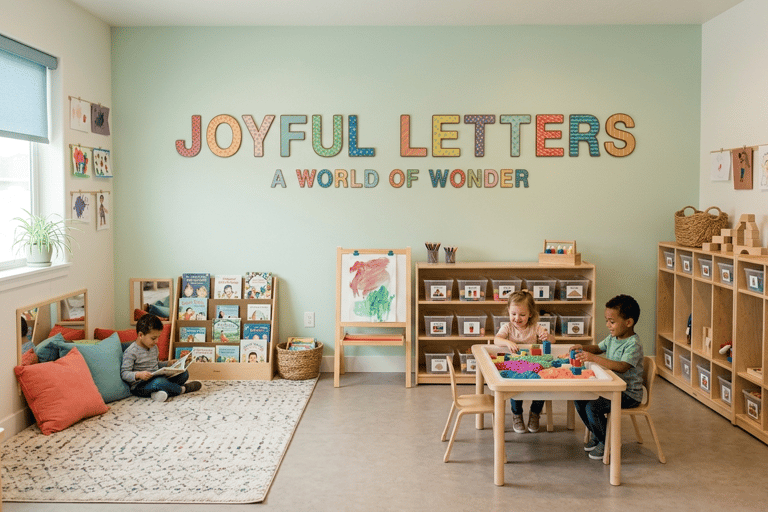
Creating a play-based learning environment
You didn’t come this far to stop
In a play-based learning environment, the "play" is the "work." The goal is to provide a rich variety of open-ended materials—often called loose parts—that encourage imagination, problem-solving, and social negotiation.
Unlike the Montessori method, which focuses on specific tasks, play-based learning thrives on materials that can be used in a hundred different ways.
1. The Block & Construction Zone
This is the "engineering" hub. It should be spacious enough for complex, multi-day builds.
Building Blocks: Large wooden unit blocks, hollow blocks for "life-size" structures, and magnetic tiles.
Loose Parts: PVC pipes, cardboard tubes, wooden planks, and colorful gems.
Small World Play: Realistic animals (forest, farm, safari), dinosaurs, and "people" figures to encourage storytelling within the structures.
Transportation: Wooden tracks, various vehicles, and "road" tape for the floor.
2. The Imaginative (Dramatic) Play Center
This area evolves throughout the year based on the children’s interests (e.g., turning a kitchen into a post office or a vet clinic).
Home Life: A play kitchen, high-quality wooden food, baby dolls with blankets, and a small table for "tea parties."
Dress-Up: Not just costumes, but versatile items like silk scarves, hats, old (clean) work shirts, and fabric lengths.
Props for Themes: * Post Office: Envelopes, stamps, and mailboxes.
Doctor: Bandages, clipboards, and stethoscopes.
Market: Baskets, play money, and a "check-out" counter.
3. Sensory & Messy Play
This zone is critical for brain development and self-regulation.
The Sensory Table: A sturdy bin filled with rotating bases: kinetic sand, dried beans, water, rice, or water beads.
Tools for Exploration: Scoops, funnels, measuring cups, tongs, and hidden treasures (like plastic gold coins or sea shells).
Messy Station: Shaving cream, "slush" (cornstarch and water), and mud kitchen tools for outdoor play.
4. Creative Arts & Maker Space
Focus on the process of making, not the final product.
The Basics: Easels, heavy-duty paper, tempera cakes, and various types of tape (washi, masking, duct).
The "Junk" Box: Clean recyclables like egg cartons, bottle caps, and yogurt containers for "tinker" projects.
Textiles: Yarn, felt scraps, fabric glue, and child-safe needles for basic weaving.
5. Literacy & Cozy Corner
Play-based learning integrates literacy into every center, but a quiet space is still essential.
Comfort: Floor pillows, a small tent or canopy, and soft lighting.
The Library: Books that reflect the current interests of the class (e.g., if they are building bridges, add books about architecture).
Writing Tools: Clipboards with paper placed in every center so children can "write" recipes in the kitchen or "blueprints" in the block area.
The Teacher's Role in Play-Based Learning
In this model, your role is to be an "intentional provocateur." 1. Observation: Watch how they play. Are they fascinated by bugs? 2. Provocation: The next day, set out a "provocation"—perhaps a tray with magnifying glasses, plastic insects, and a book about ants—to see if it sparks a new direction of play. 3. Scaffolding: Join the play briefly to model language. "I see you're building a tower. I wonder how we could make the base stronger so it doesn't tip?"
Since you’re managing kids across different ages, do you find that your older students (ages 5–6) tend to lead the play, or do you prefer to set up separate "zones" for the younger ones to avoid their builds being knocked over?